
There was an announcement in May 2022 that account deletion requirements take effect June 30. I am not sure how enforcement worked (maybe there was a grace period), but from October 2022 my app was rejected for missing Sign In with Apple token revocation.
I use @capacitor-community/apple-sign-in with Firebase Authentication and wondered if the feature existed—it does not yet in that stack (earliest release might be Q1 2023).
https://github.com/firebase/firebase-ios-sdk/issues/9906#issuecomment-1285939323
So I implemented it myself in Node.js and released it; here is a short summary of how.
Implementation
Get the Sign In with Apple authorization code
Revocation requires a token. Asking users to log in again at account deletion to "delete the token" feels suspicious when removing personal data, so first persist the authorization code you get on initial Sign In with Apple. When @capacitor-community/apple-sign-in succeeds, you receive a response object.
const appleLogin: {
  response: ResponseSignInWithApplePlugin;
} = await SignInWithApple.authorize();
The type looks like this.
export class ResponseSignInWithApplePlugin {
  user: string;
  identityToken: string;
  authorizationCode: string;

  email: string;
  givenName: string;
  familyName: string;
}
authorizationCode is the short-lived token. Send it to your server, obtain a refresh token, and keep it until the user deletes their account.
Obtain a refresh token
Get a Private Key from Apple
At https://developer.apple.com/account/resources/authkeys/list, create a Private Key.
Certificates, Identifiers & Profiles > Keys
Click the plus icon next to Keys and create a key. Enter any Key Name and enable Sign in with Apple. You will get three pieces of information.
-
PrivateKey
The secret key starting with-----BEGIN PRIVATE KEY-----in the downloaded file. You cannot download it again, so save it. -
Key ID and CONFIGURATION
View these inView Key Details.
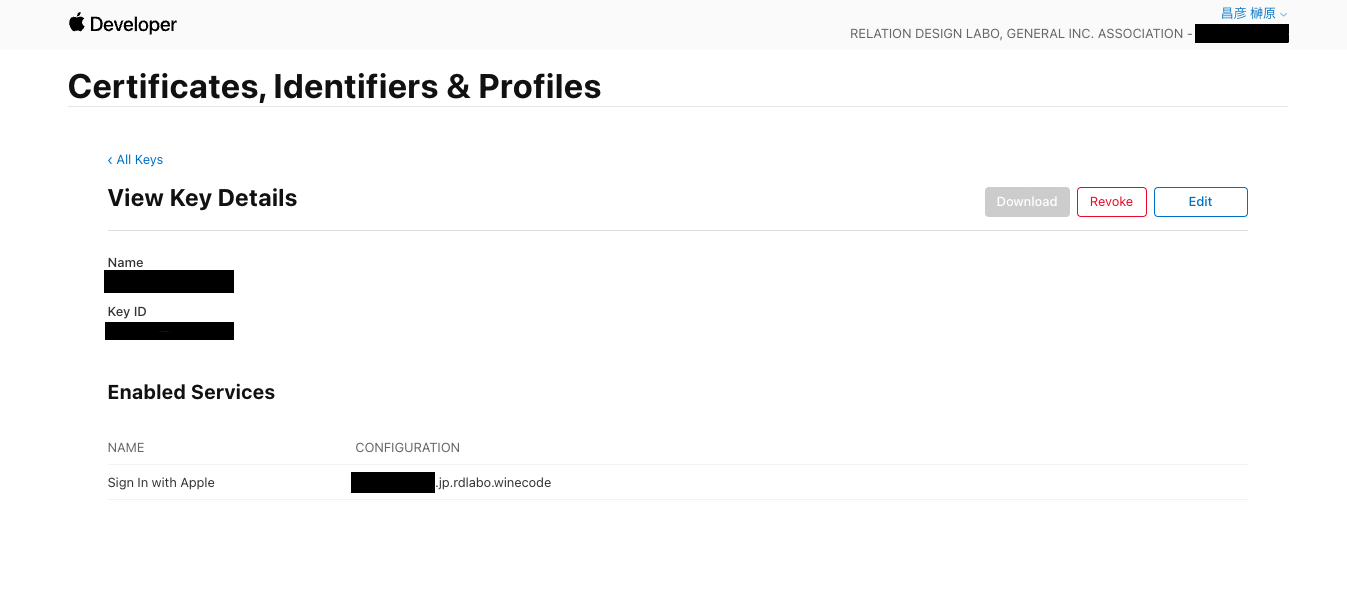
Key ID is as labeled. CONFIGURATION is the prefix before your bundle ID. My app bundle ID is jp.rdlabo.winecode, so it is the part before that (redacted in the image).
Create a JWT in Node
Authentication uses JWT, so install jsonwebtoken.
% npm install jsonwebtoken
Then create a method that builds the JWT (I use class-based NestJS, so this lives in a class).
import { sign } from 'jsonwebtoken';

const makeJWT = () => {
  //Sign with your team ID and key ID information.
  return sign(
      {
        iss: '●●●●', // Replace with your Apple Developer Team ID
        iat: Math.floor(Date.now() / 1000),
        exp: Math.floor(Date.now() / 1000) + 120,
        aud: 'https://appleid.apple.com',
        sub: 'jp.rdlabo.winecode',  // Replace with your bundle ID.
      },
      '●●●●', // Replace with the private key beginning with -----BEGIN PRIVATE KEY-----. A string is fine.
      {
        algorithm: 'ES256',
        header: {
          alg: 'ES256',
          kid: '●●●●', // Replace with the Key ID
        },
      },
  );
}
That gives you a JWT for Apple.
Use the JWT to obtain a refresh token
Apple's REST API expects form-urlencoded strings, so install qs to stringify objects easily.
% npm install qs
POST to Apple's REST API. Here I use @nestjs/axios, so it returns an Observable; a normal Promise-based HTTP client (or fetch) works too.
import { HttpService } from '@nestjs/axios';
import { stringify } from 'qs';

const { data } = await firstValueFrom(
  this.http.post(
    'https://appleid.apple.com/auth/token',
    stringify({
      code: authorizationCode,  // Authorization code obtained from Capacitor
      client_id: 'jp.rdlabo.winecode', // Your bundle ID
      client_secret: makeJWT(), // The method created earlier
      grant_type: 'authorization_code',
    }),
    {
      headers: {
        'Content-Type': 'application/x-www-form-urlencoded',
      },
    },
  ),
)
On success, data contains a persisted token under the key refresh_token. Save it. With Firebase Authentication, store it in that service's user table; otherwise use your own persistent DB.
Revoke the user with the refresh token
Finally, account deletion—POST to Apple's REST API with the saved refresh token.
import { HttpService } from '@nestjs/axios';
import { stringify } from 'qs';

await firstValueFrom(
  this.http.post(
    'https://appleid.apple.com/auth/revoke',
    stringify({
      token: authorizationCode,  // Stored refresh token
      client_id: 'jp.rdlabo.winecode', // Your bundle ID
      client_secret: makeJWT(),
      token_type_hint: 'refresh_token',
    }),
    {
      headers: {
        'Content-Type': 'application/x-www-form-urlencoded',
      },
    },
  ),
)
When the token is revoked, you cannot use it for API calls, and on iPhone you can confirm the app disappears from
Settings > Apple ID > Password & Security > Apps Using Apple ID
Summary
I have not heard many rejection stories for this requirement yet, so enforcement may still be ramping up. If you use Sign In with Apple with Capacitor and got rejected, I hope this helps.